
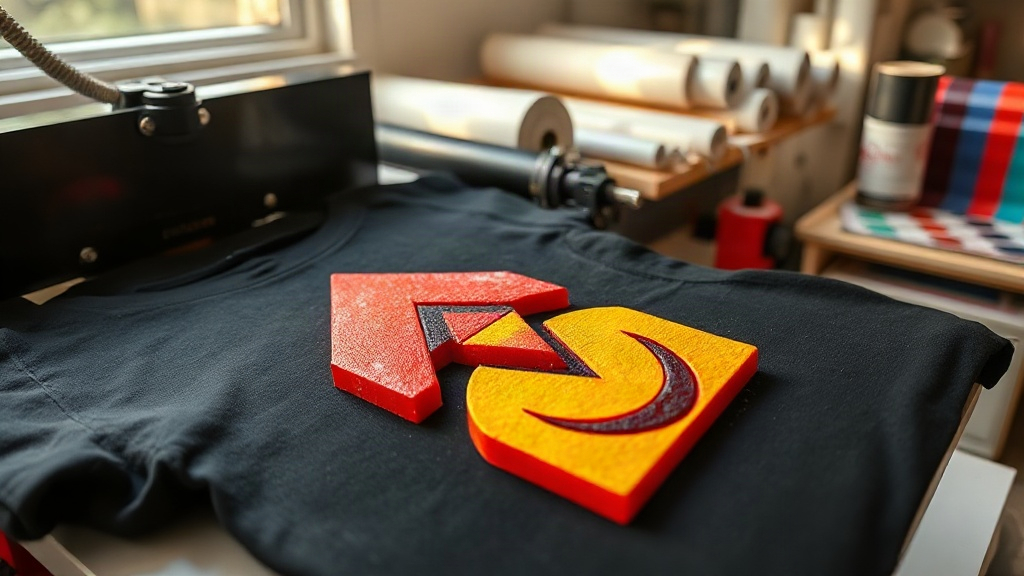
When you first see a shirt with a raised, almost sculpted design that catches the light and begs to be touched, you might assume it took hours of embroidery or specialty screen printing. But there's a good chance it was created with DTF transfers, a technology that has quietly revolutionized how custom apparel makers achieve dimension and durability. Unlike traditional heat transfers that lie flat, DTF transfers can be combined with foaming agents to produce a 3D puff effect that stands up to washing and wearing. In this guide, I'll walk you through everything you need to know to start creating your own 3D puff masterpieces, from choosing the right films to dialing in your heat press settings.
What Are DTF Transfers and Why the 3D Puff Hype?
DTF stands for Direct to Film. In this process, a digital printer prints your design onto a special PET film using water-based inks, then applies a hot-melt adhesive powder. When you heat press the transfer onto fabric, the adhesive melts and bonds the ink to the garment. The result is a soft, stretchable print that works on cotton, polyester, blends, and even nylon. But the real magic happens when you introduce a puff additive to the ink. This additive expands under heat, creating a raised, three-dimensional texture that mimics embroidery or foam printing without the complexity.
Why is this such a big deal? Because traditional 3D effects like screen printing puff require separate screens, special inks, and a lot of trial and error. DTF transfers simplify the workflow: you can print intricate designs with fine details and still get that puffy look. Plus, DTF transfers are incredibly durable. They resist cracking, peeling, and fading, even after dozens of washes. For small businesses and hobbyists alike, this opens up a world of creative possibilities.
The Science Behind 3D Puff DTF Transfers
To get a reliable 3D effect, you need to understand the chemistry. Standard DTF inks are formulated to cure at relatively low temperatures, but puff additives are typically microspheres that expand when heated to around 300°F (150°C). The challenge is balancing the expansion with proper adhesion. If you overheat, the puff can collapse or the transfer can scorch. If you underheat, the adhesive won't bond and the puff won't rise.
Most puff DTF transfers use a two-layer approach: a base layer of standard ink for color and a top layer of puff ink for dimension. Some printers mix the puff additive directly into the CMYK inks, but this can clog printheads. The better method is to print the puff layer as a separate spot color or white underbase. That's why many professionals prefer to order custom DTF transfers from a specialized provider rather than trying to mix their own. At 3dembroidered.com, we've perfected the ratio of puff agent to adhesive so you get consistent results every time.
Step-by-Step: Applying 3D Puff DTF Transfers
Getting a perfect 3D puff requires attention to detail at every stage. Here's my tried-and-true process, refined over hundreds of presses.
1. Choose the Right Fabric
Not all fabrics play nice with puff. Tightly woven cotton and cotton-poly blends work best because the puff can expand without being constrained. Loosely knit fabrics like coarse sweaters may swallow the effect. Also, avoid fabrics with heavy coatings or water repellents; they prevent the adhesive from gripping.
2. Preheat Your Press and Garment
Set your heat press to 300°F (150°C) for the puff layer, but check the puff film's instructions. Prepress the garment for 3-5 seconds to remove moisture and wrinkles. This step is critical: moisture turns to steam and can cause the puff to bubble unevenly.
3. Position and Tack the Transfer
Place the DTF transfer with the printed side up (adhesive side down) on the garment. Cover with a Teflon sheet or parchment paper. Press for 5-8 seconds with medium pressure (about 4-6 on a 1-10 scale). This tacking step sets the adhesive without fully activating the puff.
4. Peel and Puff
Wait for the transfer to cool completely (about 30 seconds). Peel off the film gently. You'll see a slightly raised design. Now, cover again with Teflon and press for another 10-15 seconds at the same temperature. This second press activates the puff agent. You'll see the design rise like a soufflé. Don't peek too early; opening the press mid-cycle can cause uneven expansion.
5. Post-Press and Cure
After the puff has risen, remove the garment and let it cool. For maximum durability, you can do a final press for 5 seconds with a cool-down mat, but this is optional. The transfer is now permanently bonded.
Common Pitfalls and How to Avoid Them
Even seasoned pros run into issues. Here are the most frequent problems and their fixes.
- Puff not rising: Your temperature is too low or your pressure is too high. Increase temp by 10°F and reduce pressure.
- Puff collapsing after wash: You likely under-cured the adhesive. Extend the second press time or increase pressure slightly.
- Uneven puff: Moisture in the fabric or transfer. Prepress longer, and store transfers in a dry place.
- Adhesive residue on film: You peeled too soon. Let it cool completely before peeling.
Designing for 3D Puff: Best Practices
Not every design translates well to puff. Fine lines and small text tend to get lost because the puff expands outward, closing gaps. For best results, use bold shapes, thick outlines, and sans-serif fonts at least 10 points. If you must include fine details, consider combining puff with standard DTF transfers: print the detailed parts flat and the main graphic puffed. This hybrid approach gives you the best of both worlds.
Also, think about color. Puff works great with solid colors, but gradients can look muddy because the expansion distorts the ink dots. Stick to spot colors or simple two-tone designs. And remember, white puff on dark fabric creates a striking contrast, while dark puff on light fabric can look subtle and sophisticated.
Why Choose 3D Embroidered for Your DTF Transfers?
At 3dembroidered.com, we specialize in high-quality DTF transfers with optional 3D puff. Our transfers are printed on premium films with eco-friendly inks and a proprietary adhesive that ensures a soft hand feel and exceptional wash durability. Whether you're a small Etsy shop or a large promotional printer, we offer bulk pricing, fast turnaround, and free design checks. We also provide detailed application instructions tailored to your fabric and press. Don't settle for flat prints that fade into the background. Elevate your apparel with 3D puff DTF transfers that people can't stop touching.
Frequently Asked Questions
Can I use DTF transfers on 100% polyester?
Yes, but you need to lower your temperature to around 280°F (138°C) to prevent dye migration. Also, use a lower pressure and a shorter press time. Polyester can scorch easily, so always test on a scrap piece first.
How many washes will a 3D puff DTF transfer survive?
With proper application, you can expect 50+ washes without significant fading or cracking. Turn the garment inside out, wash in cold water, and tumble dry low. Avoid bleach and fabric softeners, which can degrade the adhesive.
Do I need a special printer for puff DTF transfers?
You can use a standard DTF printer, but you'll need to either use a separate puff ink cartridge or apply a puff powder after printing. Many professionals prefer to order pre-made puff transfers from a supplier to avoid clogging their printheads. That's where we come in.
What's the difference between DTF puff and screen print puff?
Screen print puff uses a special ink that expands under heat, but it requires a screen for each color and is limited in detail. DTF puff allows for full-color, photographic designs with fine details, and you can apply it with a single transfer. It's faster and more versatile for small runs.
Can I layer DTF transfers with puff on top?
Absolutely. Many creators layer a standard DTF transfer as a base and then add a puff transfer on top for a mixed-media look. Just make sure to press the base layer first, then apply the puff layer with a slightly lower temperature to avoid over-expanding the base.