
If you run a small print shop, a team uniform order, or an Etsy store that ships custom tees, you have probably been asked for a design with gradients, tiny text, or a photo-realistic graphic that embroidery simply cannot reproduce. That is usually the moment someone mentions DTF transfers. The method went from a niche workshop trick to a mainstream decoration option in a few short years, and for good reason: it handles artwork that screen printing and embroidery both struggle with, on almost any fabric, without a minimum order quantity. But how does it actually perform after twenty washes? What does it cost per piece? And when should you still reach for the embroidery machine instead? This guide answers those questions with practical detail rather than marketing promises.
What a DTF Transfer Actually Is
DTF stands for direct to film. A printer lays a mirror-image design onto a special PET film using water-based pigment inks, then scatters a thermoplastic powder adhesive over the wet ink. The powder sticks only where ink was printed. After a curing pass, you have a flexible, dry transfer sheet that can sit in a drawer for months.
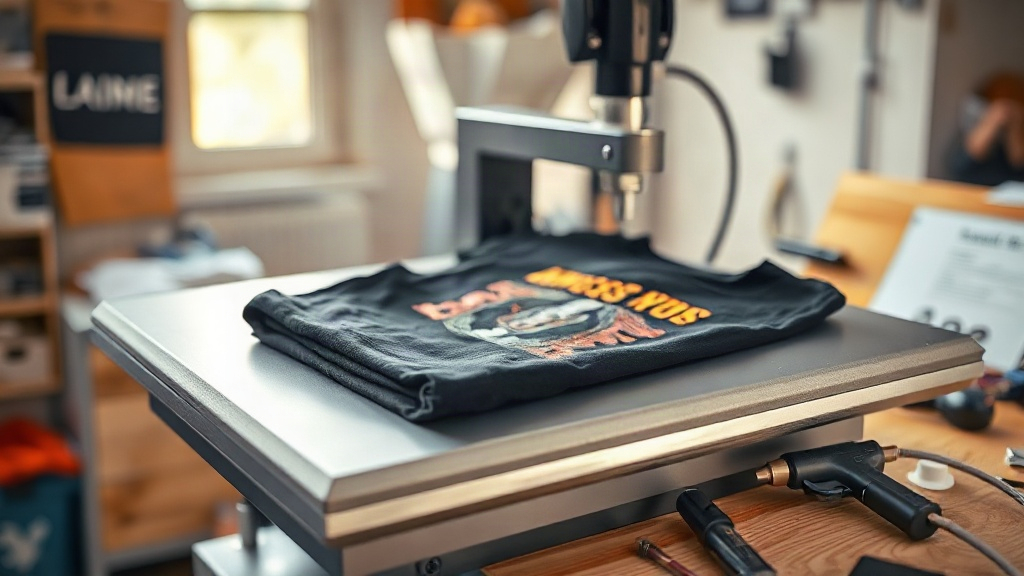
To apply it, you place the film on the garment, press it at roughly 150 to 160 degrees Celsius (about 300 to 320 Fahrenheit) for 10 to 15 seconds, let it cool, then peel the film away. The ink and adhesive stay bonded to the fabric. A second short press under a cover sheet usually improves the hand feel and wash resistance.
Why the Powder Layer Matters
That adhesive powder is the whole trick. Without it, the ink would sit on top of the fabric like a sticker and flake off within a few washes. The powder melts into both the ink and the fabric fibers, creating a mechanical bond that flexes with the garment instead of cracking at the first stretch. This is also why cure temperature and time matter so much: undercured powder looks fine on day one and starts peeling on day ten.
How DTF Transfers Compare to Embroidery
This is the comparison most people searching for information actually care about, especially if they already own an embroidery machine or work with a decorator who does.
- Detail and color: DTF reproduces photographic gradients, fine linework, and unlimited colors. Embroidery is limited by thread colors, stitch density, and the physical size of a needle.
- Hand feel: A DTF print adds a soft, slightly rubbery layer. Embroidery adds raised thread with a structured, premium feel that many customers associate with quality workwear.
- Durability: Properly applied DTF typically lasts the life of the garment with normal washing. Embroidery outlasts the fabric itself in most cases and never cracks.
- Setup: DTF needs no digitizing fee, no thread changes, and no minimum quantity. Embroidery requires a digitized file, which adds cost and time to small orders.
- Fabric compatibility: DTF bonds to cotton, polyester, blends, canvas, and even some nylons. Embroidery can distort lightweight or stretchy fabrics without stabilizer and careful hooping.
In practice, many shops use both. A left-chest logo in embroidery and a large back print in DTF is a common combination for teamwear, because it gives the structured look where it reads best and full color where the design demands it.
Realistic Durability: What to Expect After 50 Washes
Durability depends on three variables: the quality of the film and powder, the press settings, and how the garment is washed. Get all three right and a DTF print will outlast most people's patience with a t-shirt.
In my own testing with a 160 degrees Celsius press, 12 seconds, medium pressure, and a 5-second second press, prints on 100 percent cotton held up past 50 home wash cycles with only slight softening of the edges. The same transfer applied at 140 degrees for 8 seconds started lifting at the corners by wash fifteen. That gap is entirely about heat and time.
Washing Rules That Actually Matter
- Turn the garment inside out before washing. Abrasion from other clothes is the number one killer of prints.
- Wash cold or warm, never hot. Heat softens the adhesive over time.
- Skip fabric softener and dryer sheets. They leave a residue that weakens the bond.
- Tumble dry low or hang dry. If you must iron, never touch the print directly.
- Wait at least 24 hours after pressing before the first wash so the adhesive fully settles.
Cost Breakdown: Where DTF Wins and Where It Does Not
Per-piece cost depends heavily on order size and design dimensions. A small A4 sheet of film carries a fixed ink and powder cost, so a tiny logo wastes most of the sheet unless you gang multiple designs together. That is a real workflow consideration: nest several jobs onto one film before printing.
For a full-front print roughly 25 by 30 centimeters, expect material costs in the range of one to three dollars per transfer depending on film quality and ink coverage. Add labor for pressing, which is often under a minute per piece. Compare that to embroidery, where a digitizing fee of 25 to 60 dollars is normal before a single stitch is sewn, and the math flips quickly for orders under twenty pieces.
Where DTF loses: very large orders of a single simple design. At a few thousand pieces, screen printing or offset transfer pricing will usually undercut DTF because the per-unit setup cost amortizes across volume. DTF shines from one piece to a few hundred.
Quality Signals to Look For in Film and Powder
Not all film is equal. Cheap PET film wrinkles under heat and leaves orange-peel texture. Low-grade powder produces a waxy, stiff hand feel. When sourcing, ask for the ink's stretch percentage, check whether the film is double-sided coated, and request a wash test sample. A supplier who cannot provide wash test results is a supplier who has not tested.
Common Application Mistakes and How to Fix Them
Most DTF failures trace back to four issues. Cold spots in the press cause patchy adhesion, so check platen temperature with an infrared thermometer rather than trusting the dial. Insufficient pressure leaves the powder unable to penetrate the weave. Peeling the film while hot pulls ink away from the adhesive, so always wait for full cool-down. And pressing over seams or zippers creates uneven pressure that no amount of time will fix; use a pressing pillow for those areas.
If a print does start lifting at an edge, a quick re-press with a cover sheet at 150 degrees for 8 seconds often rescues it. This works because the adhesive is thermoplastic: it can be reactivated.
Frequently Asked Questions
Do DTF transfers work on dark and light fabrics equally well?
Yes. Unlike sublimation, which needs a light polyester surface, DTF prints an opaque white ink layer under the color, so the same transfer performs on black cotton and white cotton alike. This is one of its biggest practical advantages for shops that stock mixed colorways.
Can I apply a DTF transfer with a home iron?
You can, but results are inconsistent. A home iron cannot hold steady pressure or temperature across a large area, which leads to patchy bonding. A cheap clamshell press is a better investment if you plan to do more than a handful of pieces.
How long can I store unused DTF transfers?
Stored flat, away from heat, moisture, and direct sunlight, transfers remain usable for six to twelve months. Humidity is the main enemy because it can activate the powder prematurely, so keep them in a sealed bag with a desiccant pack.
Is DTF safe for children's clothing?
Water-based pigment inks used in quality DTF film are generally considered safe for apparel, and the cured print is inert. If you sell children's wear, ask your supplier for documentation on ink composition and any relevant safety certifications, since regulations vary by market.
Why does my DTF print feel stiff or plastic-like?
Stiffness usually comes from too much ink coverage, low-grade powder, or over-pressing. Reducing the white underlayer thickness in your RIP software, switching to a finer powder, and pressing at the correct temperature for the full time rather than a hotter shorter cycle all improve the hand feel noticeably.